Sunday, February 27, 2011

Bacon Fate

In case you're curious about what we did with the rest of our homemade bacon...

Most of the bacon, I served alongside cheese and punch at my birthday party. I cubed it and roasted it in a 400 degree oven for maybe 20 minutes:

Bacon bites

Bacon bites

The simple preparation really let the flavors of the cure come through; very garlicky! Needless to say, there were no leftovers.

The morning after, my husband and I enjoyed some scrambled eggs (with spinach-artichoke dip leftover from the party) and classic, fried bacon:

Bacon and eggs

Cooked to crispy, this bacon basically disintegrates in your mouth.

Finally, I made the last little bit into crispy lardons to garnish some lemony pasta:

Spaghetti with lemon and olive oil

Again, the flavor is strong enough to leave an impression even when using just a little bit.

As I mentioned in the previous post, I've got quite a bit of the basic dry cure left. I'm excited to be taking a whole hog butchering class with 4505 Meats on Monday night; with any luck, I'll be bringing home some more pork belly!

In the meantime, here's a preview of what I've got brining in the fridge:

Cow tongue

Come back next week for my completion of the March charcuterie challenge!

Saturday, February 19, 2011

The bacon is here!

And it looks like real bacon! *beams like a proud parent*

It looks like real bacon!

After letting the pork bellies sit in the cure for 7 days, I took them out of the fridge yesterday and rinsed them off:

About to rinse

Ready to roast

...and roasted them in the oven:

Roasting the bacon

Roasted bacon

Mmm, bacon.

Everybody, this is seriously delicious stuff. The garlic comes through pretty strong, which is certainly not a problem for me. Love it! I do kind of wish, since we ended up curing the bacon in two separate bags, that I'd done one savory and one sweet, but when it comes down to it, I am not disappointed at all with the savory version.

Anyone who knows me or has read this blog in the past should not be surprised at the first dish I chose to feature the bacon, since it combines bacon with two of my other favorite foods:

Bacon, beans, and brussels sprouts

That's right: bacon, brussels sprouts, and beans. If you're following along, here's the recipe!

Bacon, Brussels Sprouts, and Beans

Serves two as a main course, more as a side

1 lb fresh brussels sprouts
1 can cannellini or navy beans, drained
2-4 slices of bacon (I cut mine thick; how much you use is really up to you)
Salt and pepper
Vinegar (red wine, champagne, balsamic, apple cider--whatever you've got!)
  • Trim the ends off of the brussels sprouts and slice them in half, top to bottom (if they're especially large, maybe slice into thirds).
  • Cut your bacon into 1-inch pieces.
  • Heat a heavy pan over medium heat; when it's hot, add the bacon. Cook until it's as crispy as you like it, then remove from the pan, leaving the grease in the pan.
Frying the bacon...

Crispy lardons
  • Add the brussels sprouts to the hot, bacon-greasy pan. Let them sit for a couple minutes to brown on one side, then give them a stir. Let them cook, stirring occasionally, until they are tender. (Depending on how much bacon grease you had, you may need to add a little olive oil to keep things loose.)
brussels sprouts
  • While the brussels sprouts cook, drain the can of beans (and rinse if you like).
  • After the brussels sprouts are tender, add the beans to the pan. Stir, cooking for just a couple minutes, until the beans are warmed through. Remove from heat.
  • Add salt and pepper to taste, as well as a splash of vinegar.
  • If serving two as a main course, plate the brussels sprouts and beans, then divide the bacon between the two bowls. If serving as a side, stir the bacon pieces into the sprouts and beans.
  • Hooray!
Bacon, beans, and brussels sprouts

Tuesday, February 15, 2011

Coming soon: homemade bacon

There's this event taking place in the home-cook blogosphere right now called Charcutapalooza. Each month of 2011, participating bloggers will attempt a different home charcuterie challenge.

February's challenge: the salt cure.

I opted to follow Michael Ruhlman's savory bacon recipe, and my friend Clay (an old friend and recent SF transplant) helped me out. What better way for two former cooking buddies to be reunited?

Mise en place

We put together the dry cure of kosher salt, sugar, and curing salt, then combined it with crushed garlic, black peppercorns, and bay leaves.

Weighing the sugar

Clay got to use my mortar and pestle, which makes everything more fun:

Crushing the spices

Dry cure + spices

The kitchen smelled truly amazing at this point, but with those ingredients, what's not to like?

Into this mixture we pressed a 3lb pork belly (cut into two pieces, since I only had 1-gallon plastic bags):

Rubbing the cure on the pork belly

Then bagged them up and stuck them in the fridge to cure!

Ready to cure!

Seriously--it doesn't get much simpler than this. Maybe 30 minutes of work, tops? (And I've got a bunch of the basic dry cure leftover; what should I try next?)

The pork belly's been curing for five days now, and we're just about ready to unveil our creation. The plan: roast it, cube it, fry it up, and serve it as part of my birthday smorgasbord on Saturday. Asked one eager friend, "Can we dip it in chocolate?"

Stay tuned...

Tuesday, February 8, 2011

Lentil burgers (I love lentils!)

Lentil burger

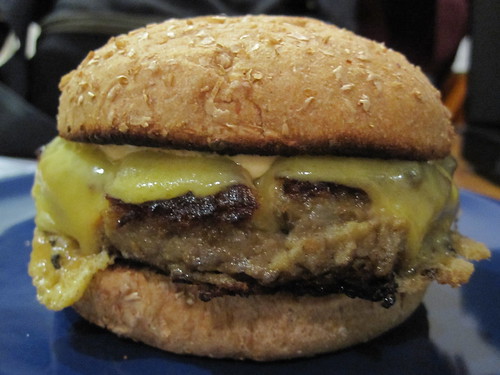
This delicious-looking burger has a secret.

Do you know what it is?

Lentil burger

Okay, so it's not that much of a secret, since I wrote the answer in the title of this blog post. Burgers! Made of lentils!

I'm going through (what I hope is not just) a phase right now where I absolutely adore lentils and beans. I sift through the food blogosphere searching for new recipes with different spices, textures, and styles. I've been avoiding breads and pastas and trying to eat less meat, and legumes have really stepped up to the plate (no pun intended) when it comes to providing the main protein in the meals I cook at home.

So, when I happened across a recipe for lentil burgers the other day, I knew I had to try it. They've got breadcrumbs in them, and we ate them on buns, so they weren't totally in line with my "cut the bread!" goals, but they were definitely delicious.

First cook up a pot of lentils (you can find my go-to recipe at the end of this post). Then, blend up a bunch of them--I got to try out my new immersion blender, which was exciting. You want them basically pureed, but do leave a few whole lentils in there.

Next, mix in some bread crumbs--fresh if possible--and a lightly beaten egg. Stick this mush in the fridge for at least half an hour.

After it's chilled, mix in some bread crumbs, and you're ready to start!

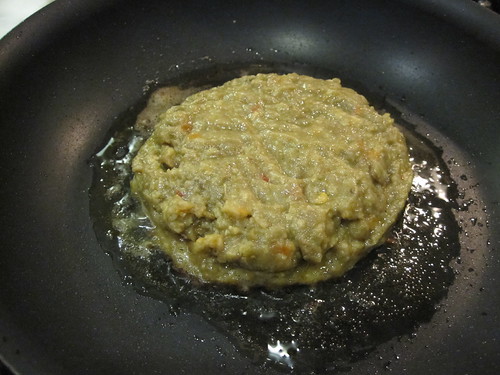
Fair warning: maybe it's because I pureed them too far, but my lentils were definitely not thick enough for me to "form patties" the way the phrase suggests. All is not lost, however! Here's what I did:

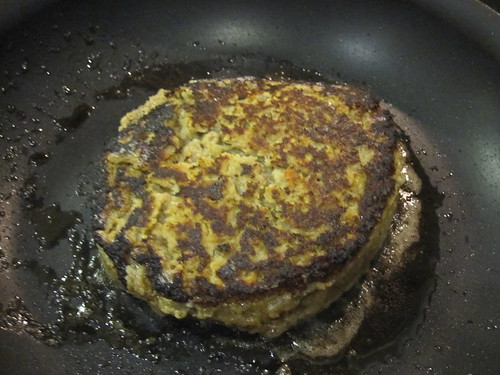
Put some oil in your pan and heat it up. Then, use a measuring cup (I used a 1/4 cup; depends on how big you want your burgers) to dump some lentil-mush into the hot oil. Push the mush around with a spatula until it's patty-shaped:

Making a lentil cheeseburger

This really wasn't difficult! Okay, now you want to let it cook until it browns on the bottom, five minutes or so. Once you've got a bit of a crust, slide the spatula underneath and flip that sucker over:

Making a lentil cheeseburger

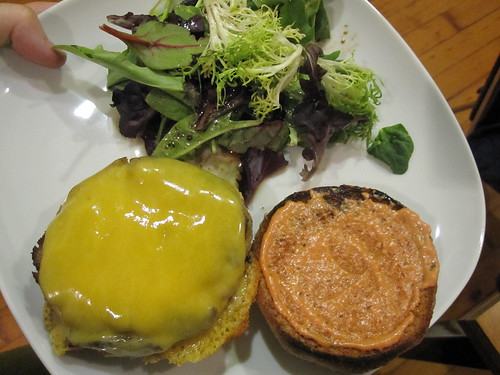
The crust on the bottom helps it hold its shape a bit, but I needed to shape it with the spatula again just a little. If you want to add cheese, now's the time to do it! Just lay the cheese over the top and put a lid on the pan. Cook until the cheese is melty.

Ta da!

Lentil burger

I really wanted ketchup and mayo on my burger, but we had no ketchup. So, I ended up mixing mayonnaise with some tomato paste and a bit of the liquid from some chilis in adobo; the sauce was creamy, tangy, and smoky all at the same time!

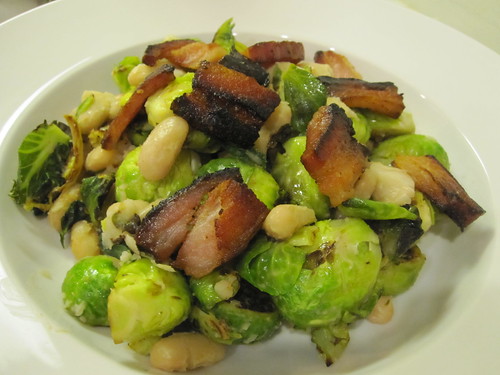
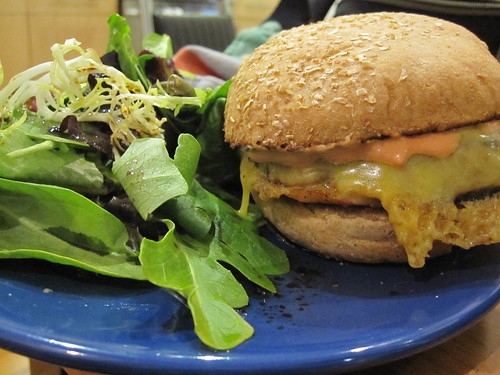
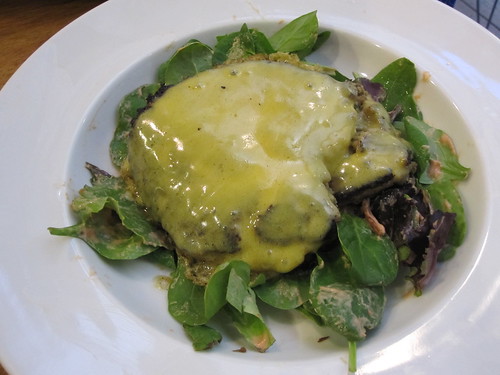
If you're trying to avoid bready things, do what I did the following day: cook a patty just like before, but slide it on top of some greens instead of onto a bun (I dressed the greens with my improvised sauce):

Lentil burger with cheddar, over mixed greens

In short: easy, delicious lentil burgers. So good, even dedicated beef burger fans will enjoy them--at least, the one I'm married to did!

Anne's Basic Lentils

olive oil
1/2 medium onion, diced
1 carrot, peeled and diced
1 garlic clove, smashed and minced
1 cup lentils (I haven't tried this recipe with red lentils, but green, brown, and French green all work)
1 bay leaf
salt and pepper
  1. Heat a pot over medium heat. Add enough olive oil to cover the bottom of the pan. Once the oil is warm, add the onion, carrot, and garlic and cook until the onion starts to soften and the carrots start to brown, stirring occasionally.
  2. Add the lentils, bay leaf, and 2 cups of water. Bring to a boil over high heat, then reduce heat to medium-low, cover, and cook until the lentils are tender, stirring occasionally. Check often to see if you need to add more water; if so, add a 1/4 cup at a time.
  3. Once the lentils are done, add salt and pepper to taste. Also, I highly recommend a splash of vinegar (apple cider, red wine, balsamic--whatever is on hand) to brighten it up.
  4. Hooray, lentils!